Dynamic scheduling for agents
The dynamic scheduling feature enables you to create your own schedule for specific weeks if configured to do so by your administrator or scheduler.
If you are included in a dynamic scheduling event, you will see an event exception appear in your daily schedule. The exception includes a link that takes you to the Agent Dynamic Scheduling page.
NOTE The only time you can create your schedule is during the exception. Once that time is past, you can only view, not edit, the Agent Dynamic Scheduling page.
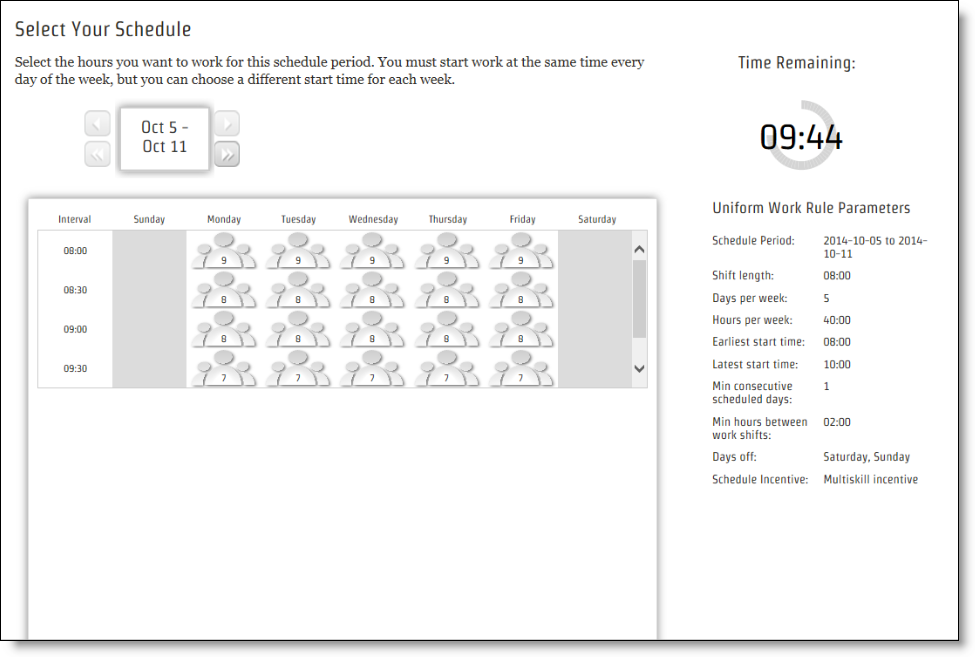
When you first access the page, you see the following:
- Work rule parameters for the schedule you will be creating. There are three kinds of work rules: uniform, hybrid, and variable.
-
Staffing icons that give you an idea of the staffing needs for the intervals that cover the times you can start your shift. In this graphic, the parameters say that you can start work any time between 08:00 and 10:00, so the staffing icons are displayed for every half hour interval between those times.
NOTE All times shown on this page are in your (the user’s) display time zone.
- A countdown timer that tells you how much time is left for you to create and submit your schedule. Once the countdown timer reaches zero, you can no longer edit or submit your schedule.
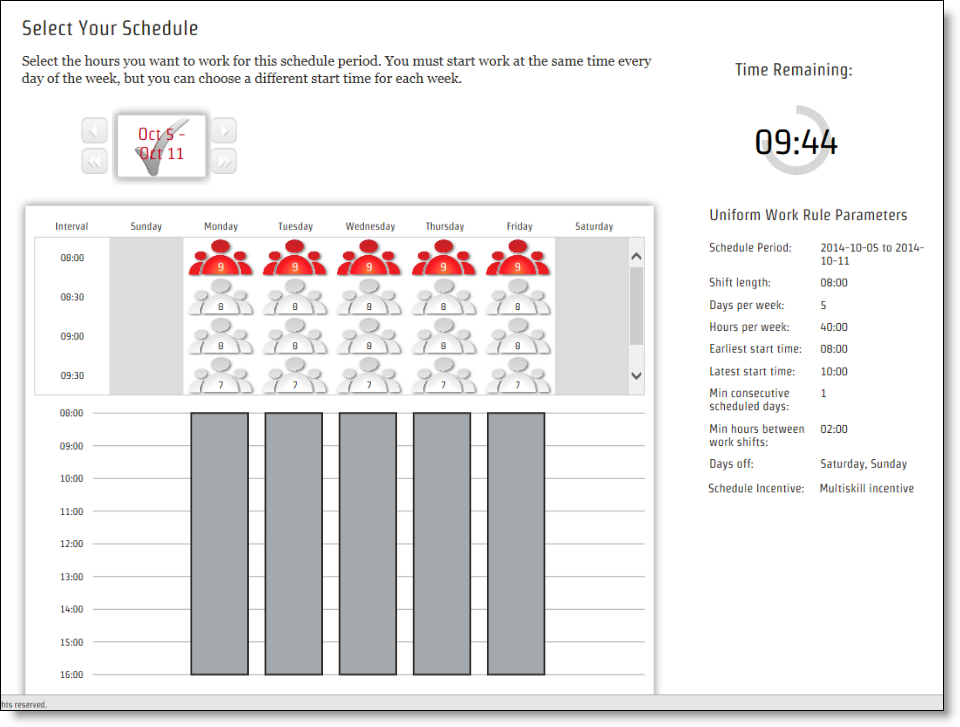
When you select your schedule, it is depicted by gray bars underneath the staffing icon section.
Staffing icons
The staffing icons depict the relative need for staffing for a shift starting in that interval.
![]()
If your administrator configures dynamic scheduling to include staffing numbers, you will see a number on a staffing icon. The number conveys the same information as the staffing icon. It is just an alternative way to display it.
![]()
The staffing icon and number are determined by the kind of work rule configured for the work shift.
| Work Rule | Calculation |
|---|---|
| Uniform | The average staffing need across all work days for shifts beginning in the interval. |
| Hybrid | The average staffing need for that day’s shift length beginning in the interval. |
| Variable | The average staffing need for the selected shift length for that day beginning in the interval. When you first view the page, the icon displayed is based on the configured minimum shift length. When you specify a shift length, the icon and number changes accordingly. |
Creating your own schedule
IMPORTANT You have a limited time to create your schedule. Keep an eye on the countdown timer so you don’t run out of time. Once the timer reaches zero, you can no longer edit or submit your schedule.
Create your own schedule
- In your schedule, click the link in the dynamic scheduling exception to access the Agent Dynamic Scheduling page.
-
Based on the work rule parameters listed to the right of the scheduling grid, select the start time for each day you will work. Use the staffing icons to help you determine which shifts have the most staffing requirements and choose accordingly.
Days that are set aside as days off display a gray column instead of any staffing icons.
If you are scheduling according to a variable work rule, and you are allowed to select a day off, do not select a staffing icon for that day.
-
When every day in the week has been configured with a work shift, a check mark appears in the date box to tell you that the work week is complete:

-
If you are to schedule more than one week, click the right arrow next to the date box to go to the next week, and then create a schedule for that week.
NOTE A different type of work rule might apply to each week you schedule.
- When you have scheduled every week, click Submit.